Building your own custom PC can be a rewarding and cost-effective way to get exactly the performance and features you want. Before you start, it’s important to understand the basic components that make up a PThe central processing unit (CPU) is the brain of the computer, responsible for executing instructions and performing calculations. The motherboard is the main circuit board that connects all the other components together, providing power and communication between them. The graphics processing unit (GPU) is responsible for rendering images and videos, making it essential for gaming and graphic design. Random access memory (RAM) provides temporary storage for data that the CPU needs to access quickly, while storage drives like solid-state drives (SSDs) and hard disk drives (HDDs) provide long-term storage for files and programs. Power supplies, cooling systems, and cases round out the essential components of a PC.

When building a custom PC, it’s important to consider your specific needs and budget. Are you building a gaming PC, a workstation for video editing, or a general-purpose computer for web browsing and office work? Understanding your use case will help you choose the right components to meet your needs. Additionally, consider your budget and how much you’re willing to spend on each component. It’s important to strike a balance between performance and cost, ensuring that you get the best value for your money.
Choosing the Right Components for Your Custom PC
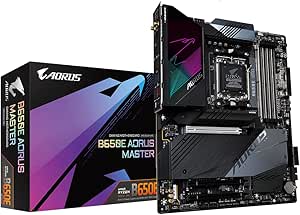
Choosing the right components for your custom PC is crucial to achieving the performance and features you desire. When selecting a CPU, consider factors such as clock speed, number of cores, and compatibility with your chosen motherboard. For gaming and graphic design, a high-performance GPU is essential, while general-purpose users may opt for integrated graphics to save on cost. When it comes to RAM, consider the amount of memory you need for your specific use case, as well as the speed and latency of the modules. Storage options include SSDs for fast boot times and program loading, as well as HDDs for large file storage at a lower cost per gigabyte.
The motherboard is the foundation of your custom PC, providing connectivity for all other components. Consider factors such as chipset compatibility, expansion slots for future upgrades, and input/output options like USB and audio ports. Power supplies are often overlooked but are crucial for providing stable power to all components. Consider factors such as wattage, efficiency rating, and modular cabling for easier cable management. Cooling systems are essential for keeping your components running at optimal temperatures, with options including air coolers, all-in-one liquid coolers, and custom water cooling loops. Finally, the case is not just a housing for your components but also affects airflow, cable management, and aesthetics.
Step-by-Step Guide to Assembling Your Custom PC
Once you have all your components ready, it’s time to start assembling your custom PBegin by preparing your workspace with a clean, well-lit area and all necessary tools such as screwdrivers, cable ties, and thermal paste. Start by installing the CPU onto the motherboard, being careful not to bend any pins or apply too much pressure. Next, install the RAM modules into their slots, ensuring they are fully seated and locked into place. Install the motherboard into the case, securing it with screws and ensuring that all input/output ports align with the case cutouts.
Next, install the power supply into the case, routing cables through the back for better cable management. Install storage drives into their respective bays or slots, connecting power and data cables as needed. Install the GPU into its PCIe slot, securing it with screws and connecting any necessary power cables. Finally, install any additional cooling systems such as fans or liquid coolers, ensuring proper airflow through the case.
Once all components are installed, connect all necessary power and data cables to their respective components. Double-check all connections and ensure that everything is secure before powering on your custom PC for the first time. If everything goes smoothly, you can proceed with installing an operating system and drivers to get your custom PC up and running.
Troubleshooting Common Issues During PC Building
While building your custom PC, you may encounter common issues that can be frustrating but are usually easily resolved with some troubleshooting. One common issue is a failure to power on, which can be caused by loose power connections or a faulty power supply. Double-check all power connections and ensure that the power supply switch is turned on before attempting to power on your PC.
Another common issue is a failure to boot into the operating system or BIOS, which can be caused by incorrect boot device settings or faulty storage drives. Enter the BIOS or UEFI settings by pressing the designated key during startup (often Del or F2) and ensure that the correct boot device is selected. If you’re still having trouble, try reseating or replacing storage drives as needed.
Overheating is another common issue during PC building, especially if cooling systems are not installed or configured properly. Check that all fans are spinning and that air flow through the case is unobstructed. If using liquid cooling, ensure that all connections are secure and that there are no leaks.
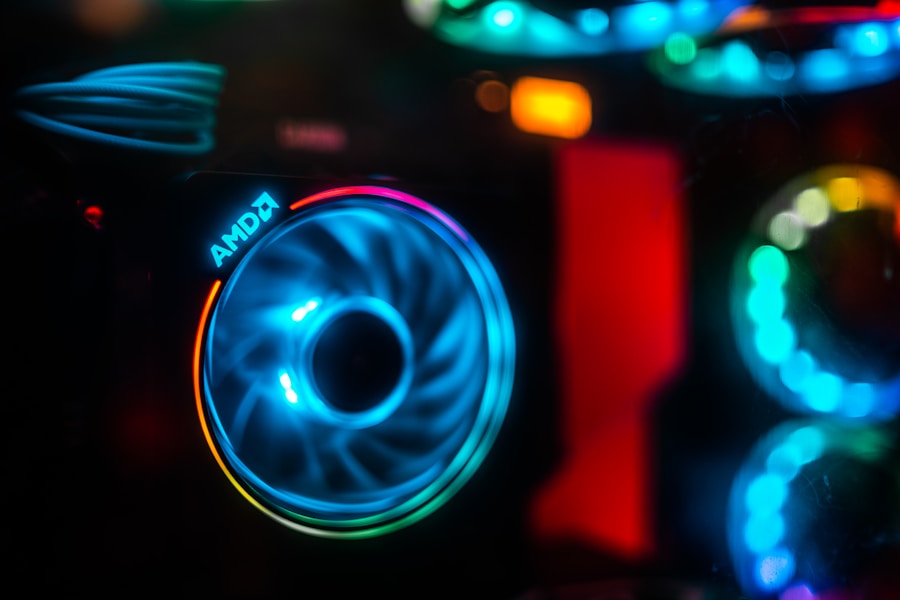
Customizing Your PC with RGB Lighting and Cable Management
Once your custom PC is up and running smoothly, you may want to consider customizing it with RGB lighting and improved cable management. RGB lighting can add a personalized touch to your build, with options including LED strips, fans, and even RGB RAM modules. Many modern motherboards also include RGB headers for easy control of lighting effects through software.

Cable management is not just about aesthetics but also improves airflow through your case and makes future upgrades or maintenance easier. Use cable ties or Velcro straps to neatly bundle cables together and route them behind the motherboard tray or through designated cable management channels in your case. Consider using custom-length cables or cable extensions for a cleaner look inside your case.
Overclocking and Performance Tuning for Your Custom PC
For enthusiasts looking to squeeze every last drop of performance out of their custom PC, overclocking and performance tuning can provide significant performance gains. Overclocking involves increasing clock speeds or voltages of components such as the CPU or GPU to achieve higher performance at the cost of increased heat output and power consumption.
Before attempting any overclocking, it’s important to research your specific components and understand their limitations. Many CPUs and GPUs have built-in overclocking features that can be accessed through software or BIOS settings. Start by increasing clock speeds or voltages in small increments and stress testing your system to ensure stability. Keep an eye on temperatures and power consumption to ensure that your components are not being pushed beyond safe limits.
Performance tuning involves optimizing system settings such as power profiles, fan curves, and memory timings to achieve better performance or efficiency. Many motherboards include software utilities for easy tuning of these settings without delving into BIOS settings.
Showcasing Your Custom PC Build and Sharing Your Experience
Once your custom PC build is complete, don’t be afraid to showcase it to the world! Share photos and details of your build on social media platforms like Reddit’s r/pcmasterrace or dedicated PC building forums like Linus Tech Tips’ forum. You may inspire others with your build or receive valuable feedback from the community.
Consider entering your build into online PC building competitions or local LAN events to showcase your skills and potentially win prizes or recognition. If you’re particularly proud of your build, consider creating a build log or video showcasing the entire process from start to finish.
In conclusion, building a custom PC can be a challenging but rewarding experience that allows you to create a system tailored to your specific needs and preferences. By understanding the basics of PC building, choosing the right components, following a step-by-step assembly guide, troubleshooting common issues, customizing with RGB lighting and cable management, overclocking for better performance, and showcasing your build to others, you can create a truly unique and powerful custom PC that reflects your personality and technical skills.
